How I Make My Reeds 2019

Back in 2014 I made a page describing how I made my reed blanks and started the first scraping steps to share some of my methods and ideas with the hopes of helping people work through reed making issues they may encounter. Five years and more than 1000 reeds later, I've decided I'd go through all of the original explanation and update it with how I now make my reeds, discussing the reason for the changes as they come along in a format mirroring the original post. The method has been refined in a few ways and some techniques have changed, but it's very similar to the way I was making reeds when I first wrote about it.


Cane Processing

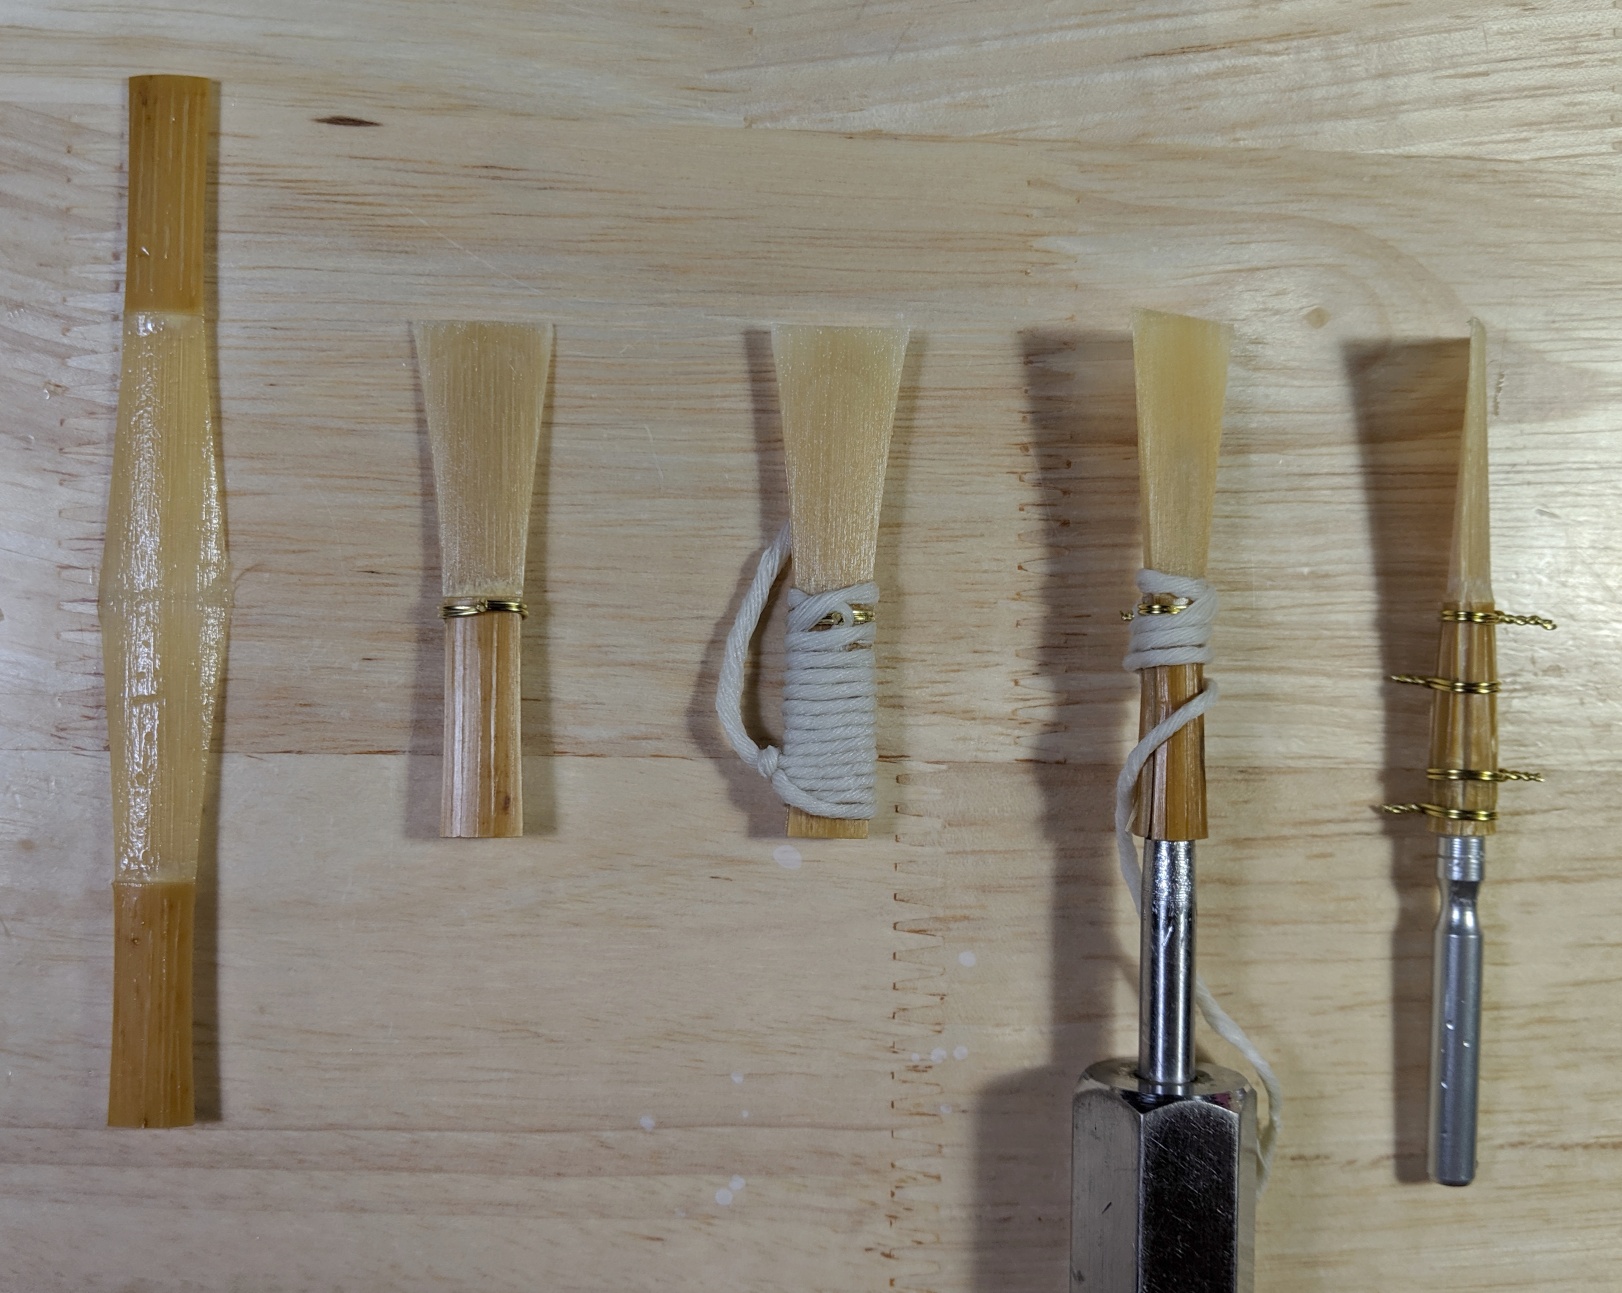
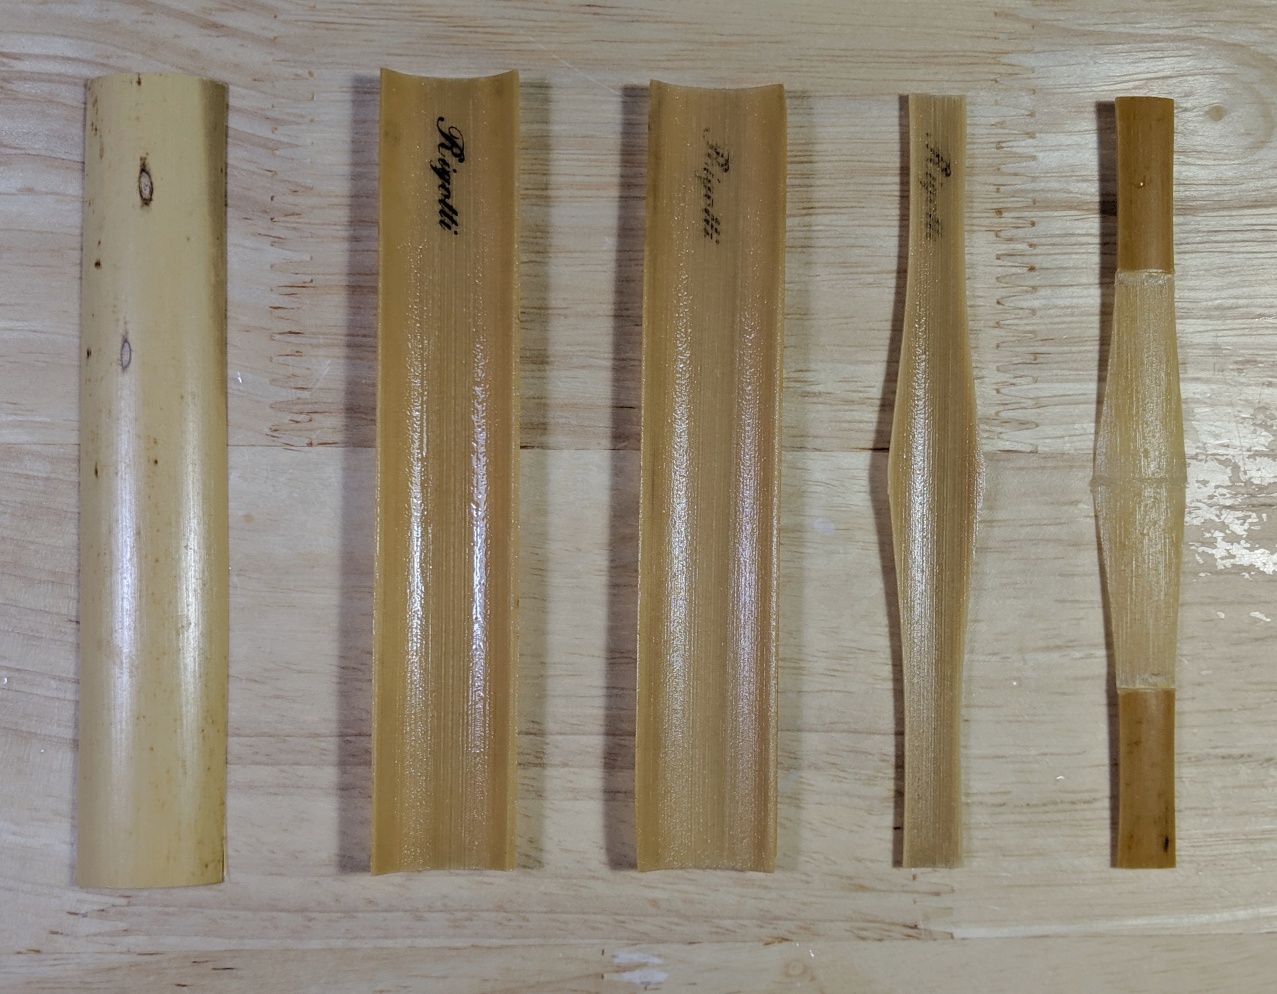
I start with gouged cane. I don't own a gouger so at least for the moment gouging my own isn't an option. I understand the usefulness of being able to control the gouge yourself, but buying gouged saves a bit of time, though it's also more expensive. I use Rigotti cane and have for years, the main reason being that it's cheap. For the price of five pieces of most brands, I can get 8-10 pieces of gouged cane. Rigotti is by no means the most consistent or even the best cane I've used, but I've been using it long enough that I know generally how much it varies and what to do to compensate for that. For those who don't know, Rigotti is 120mm long pieces with an eccentric gouge. I try to buy 2-3 times the amount I use in a year each year now so that I can play on more aged cane than what usually ships - it seems that many people with access to cane that is aged extra (10+ years) report better results, so I figured I would get a start on building up an aged supply and right now am playing on cane purchased at the end of 2016. Cane processing from dry gouged to soaked GSP

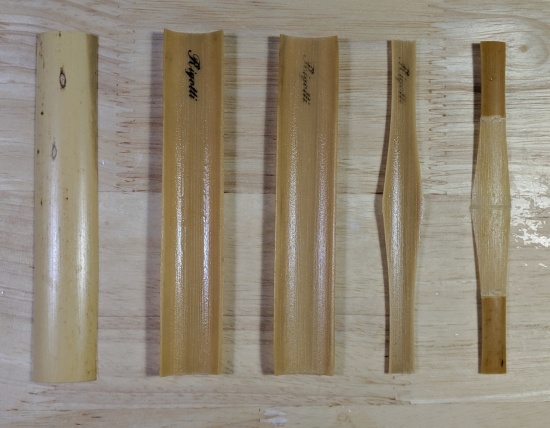
The gouged cane is soaked overnight, but often goes longer, up to several days. This is a fair bit longer than the 6 hours I used to use, but it's more a product of scheduling than any percieved benefit. First I sand the inside of every piece of cane with 400 grit sandpaper until they feel fairly smooth, usually leaving the rigotti stamp on the inside somewhat faded. I've always preferred smoother reed interiors, and sanding before shaping means you don't risk messing up the corners on the edge of the shape. After sanding, I shape using a straight Fox 2 shaper, sometimes stacking and aligning two pieces of cane to shape at once. Being careful and using a sharp razor blade, I've gotten good shaping results with mostly downward (from the center to the end of the cane) cuts with a couple of upward ones when the dimensions near the base get close. This helps prevent the little flare in the shape at the butt of the reed from being accidentally cut off. I then profile the cane on a Rieger profiler I purchased a few years ago, and in swapping the profiler, I get more consistent results than on my last one. The issue with breaking the center of the cane near the corners is almost entirely gone, though I do have to treat it gingerly when working that area. The center and collar cutters on the Rieger profiler also help make those depths a little more consistent and make for a very easy place to fold. From the profiler, the processed cane gets stacked to be dried, at least for a day.

When I'm ready for forming, the cane is soaked again for at least three hours. I haven't noticed any significant side effects to over-soaking at this stage, so the occasional 24+ hour soak has been known to happen.


Forming

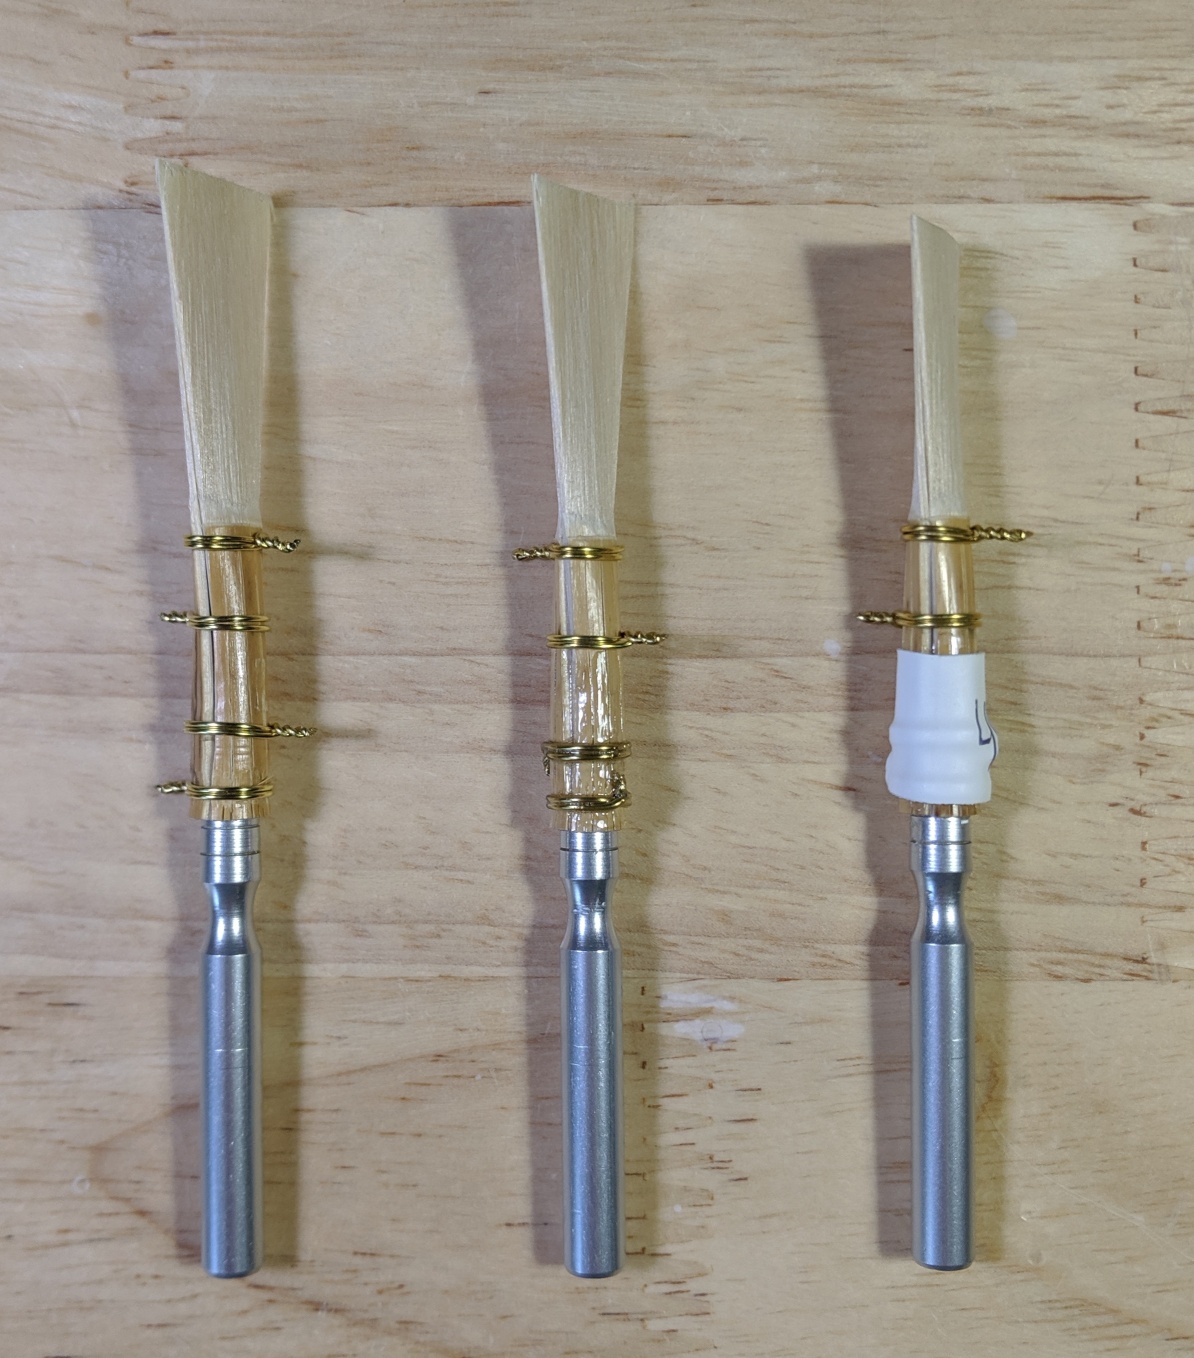
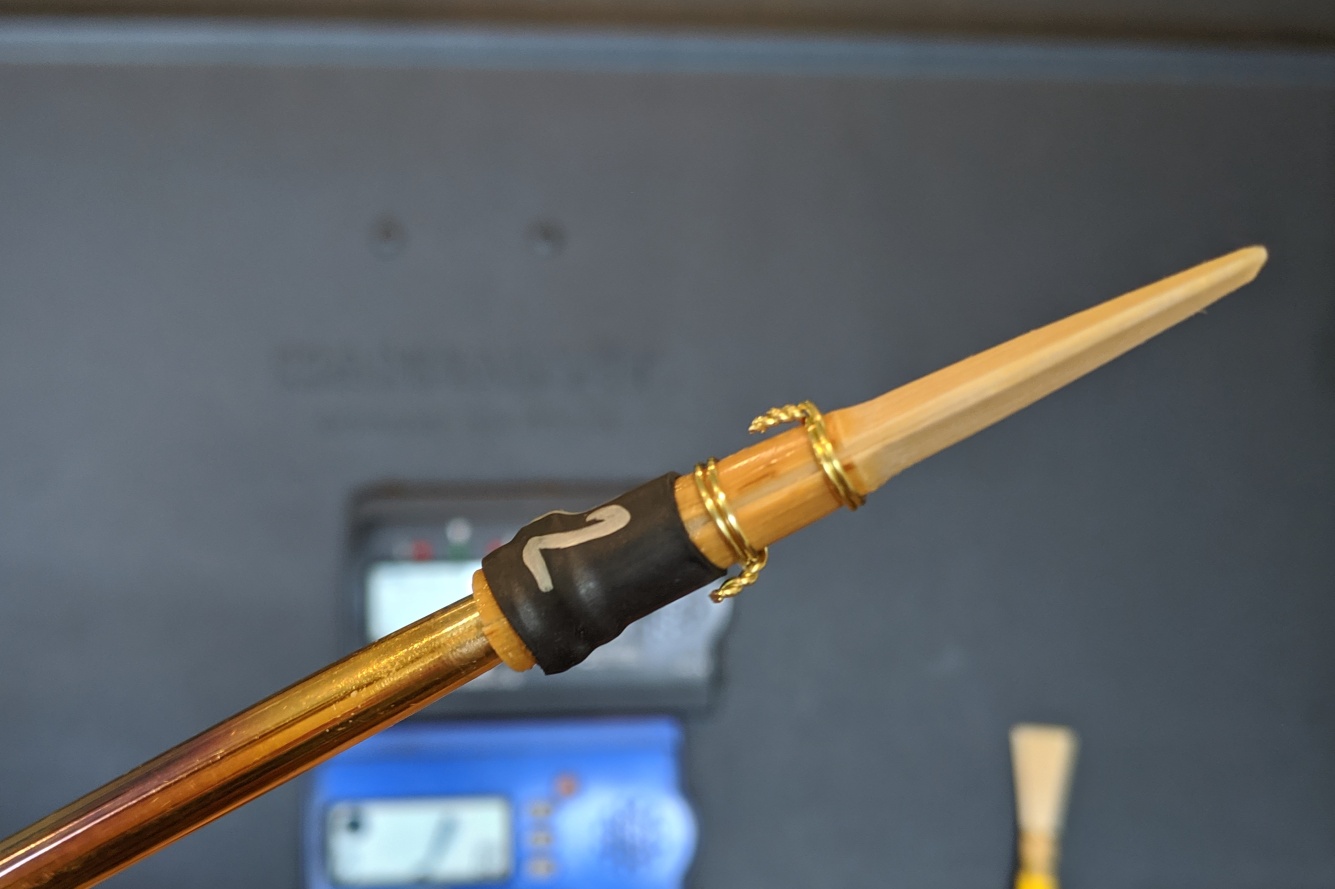
The soaked, processed cane starts the forming steps with scoring against an easel. I make five scores with the center one about 4mm back from the collar and the others up to where the first wire will be. Then I fold the cane over and put on the first wire, checking the slip to be right, tightening it down reasonably far, and using the pliers to keep the wire close to the cane instead of bent away from it, keeping it tighter for forming. If your first wire is tight, you reduce the risk of cracking down the spine into the blade significantly (if it's a problem for you, cutting the collar before forming can also help). I am careful to line up the blades in this step, specifically between the first wire and the place where the second wire will go, to ensure that one side is slightly overlapping the other on alternate sides - a slight side slip. It doesn't really matter if the slip looks different towards the butt of the reed, but this slip is something that will be repeatedly checked and can be altered several times in the process. It's worth mentioning that if you need to correct the slip, you can do it with pliers (but do it before tighting the wire all the way), but be careful not the reverse the slip. If you accidentally push too hard and overcorrect to reverse the slip when the wire is too tight, the sharp edge of the cane breaks, and will come off, often leaving a leaky gap, in a finished blank. With the wire on, the reed then gets wrapped up in cotton twine, reasonably tightly, and put in water hot enough to scald, but not boiling.

Forming steps from soaked GSP to fully formed and on the drying rack

After a couple minutes in hot water, the reed comes out and is immediately jammed on my forming mandrel, being careful not to grab the reed too close to the first wire when jamming it on to prevent mangling the cane in front of the second wire. The string then comes off and the first thing I do is again check the slip and curvature of the cane at the first wire. You can adjust them by using your pliers lightly, I find that typically one blade will curve more than the other, so I will often adjust the roundness of the wire on the less curved side or flex the cane of the flatter side more to overlap better behind the first wire. Once I'm satisfied with the curvature and slip up front, I put on the second wire, with it sticking out of the opposite side of the first, then comes the third wire again on the same side as the first. I crush the cane of the butt with my pliers against the mandrel below the third wire, being careful not to crush the very end of the reed, to better seal against the bocal when the blank is finished. Once the cane at the end is crushed, I put on a fourth wire on the same side as the second. The fourth and third wires are tightened to be firm, the second and first wires will be somewhat looser, but firm enough to keep from moving around. The reed then goes immediately onto the drying rack peg and is finished for the day. I don't typically measure my placement of my wires, but have adjusted them as I've noticed problems over the years and am fairly consistent with my placement. Measuring one normal looking blank from the collar to the center of each wire, I get 1mm, 9mm, 21.5mm, 25mm with a tube length of 27.5mm. These measurements have changed slightly from the previous writeup, partly because of the difference in profiles.


Gluing

After at least 24 hours drying time, I move the reed to my regular mandrel and tighten the wires, the fourth and third to be quite tight - not moving at all, the first and second tight enough to keep them from falling off. The tightness of the third and fourth wire can be adjusted to get the tube size right; leaving them looser will make the tube larger when jammed on the mandrel, tightening it will shrink the tube and keep it from going as far. It's worth watching for gaps along the seams at this stage, if they are there, then you can tighten the back wires to keep the mandrel from going as far in and close the gap, this is especially important when making reeds for a slightly wider opening bocal like the one I play on, so I find myself just jamming them on the mandrel less to prevent gaps on the sides and just expecting to ream every reed. Once the wires are tightened appropriately, I bend down the third and fourth wire to face the other and jam the reed back on the drying pin. Then comes a coat of flexible glue – I've been using the classic Duco cement, though it's gotten harder to find in stores. This glue will keep the wires in place in extreme dry, but also seals any little gaps in the cane. The glue covers the third and fourth wire, stops before the end of the reed, and extends most of the way to the second wire – similar coverage to where the turban would go. Then the glue is left to dry again on the rack.

Dried, wires tightened and glued, and finally clipped as a new blank

When the glue is dry, after at least 12 hours or so, they are ready to become blanks. Many people let their reeds age for a long time on a drying rack before they will play on them, but I'm not one of them. My reeds typically spend ten days or so on the drying rack after gluing, but it can vary between one and two weeks. I generally start a reed every other day and make them in batches of five, so that the drying rack holds between five and ten blanks or 10-20 days worth of reeds. Letting reeds age on the drying rack certainly does not hurt them, but I don't have the rack capacity or the desire to age them for months, so I don't.

I use 3/8" heat shrink tubing to finish my reeds, I've used thread quite a bit before and have switched back to try it a few times, but there are a few things I don't like about the traditional turban wrap. Compared to heat shrink, it takes a long time – even though you can wrap and seal a turban in five minutes or so, you can apply heat shrink in just a few seconds seconds. I've also found that while a turban will strengthen your reed, it will slightly dampen the sound. If you build your reeds to be brighter or slightly thinner to counteract this, you can still get great results, but my style has gravitated to something that heat shrink, which essentially does nothing to the structure or sound of the reed, suits. The heat shrink tubing cleans up the look of the reed and can be done in different colors to differentiate between reeds or just to be colorful. I also number my reeds from 0-99 to keep track of their age relative to others in my box. Numbering them also gives you a good idea of your production speed. I use a heat gun for my shrink wrap as my electronics projects keep one on my desk, but they are very inexpensive and being able to dial in a specific temperature can be very useful to prevent damage or singeing.

With the heat shrink on I measure the reed (should be 60mm overall) and clip it to 54mm. The clipper I use is a large end-on wire cutter (that has not cut wire in its lifetime), so I will lightly sand the tip to remove any roughness or true up any slant that may result. Since my profile measurements stay the same, I know that a 54mm overall length will give me a 26.5mm blade, measuring it before you clip ensures that misalignment or different length cane doesn't throw this off. Once clipped, I put it on my mandrel and tighten the wires if they feel loose enough to slide around, then I bend down the ends and the reed is ready for its first soak and play.


It's a blank!

Soaked and ready for the first play


I've decided to more thoroughly flesh out the preliminary scraping section of the previous "How I Make My Reeds" page in its own page, which is coming soon! The methods here have changed more from the forming methods I described in the original page. While I mentioned my warm up routine as well, that will also be spun off on a new page, since while the warm up is integral to the way I break in and develop my reeds, I also want to discuss creating a warm up routine that suits your needs, as I have all of my students develop one to use because of how helpful it can be.


I hope this page has shed some light on my process and thinking, and I hope that helps you consider and improve upon your own methods. There is no substitute for a good teacher working with you and there is no substitute for your own experience, but having more information, ideas, and examples can enrich your understanding and improve your own methods. The style I have arrived at blends that of my major teachers, masterclass instructors, and colleagues with my own spin and quirks. Hopefully this revision of the now five year old page sheds some light on the small tweaks I've made to my methods in the course of many reeds and performances. I expect they will continue to evolve with time, but I suspect the rate of change will be less in the next five years than the last!


August 5, 2019


Copyright